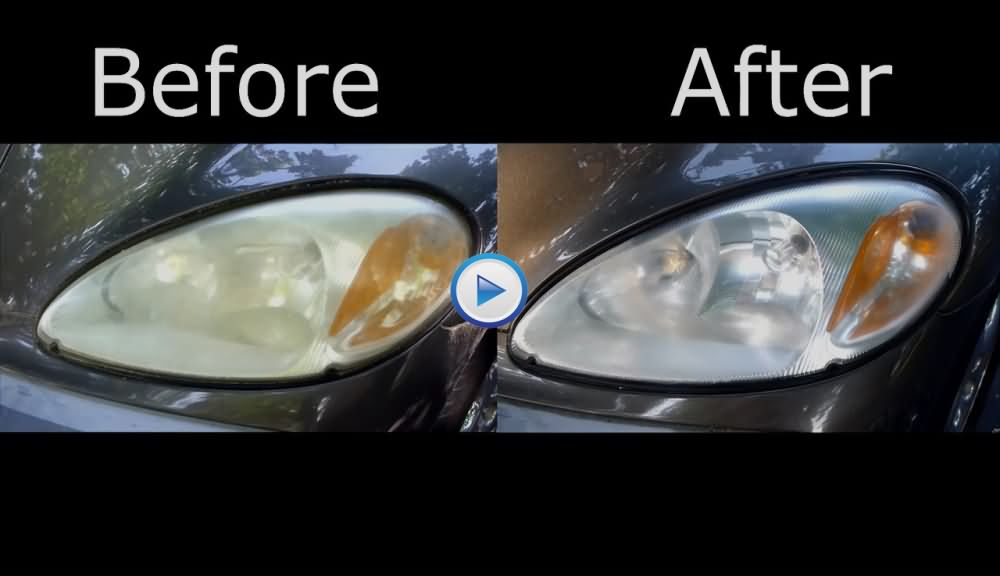
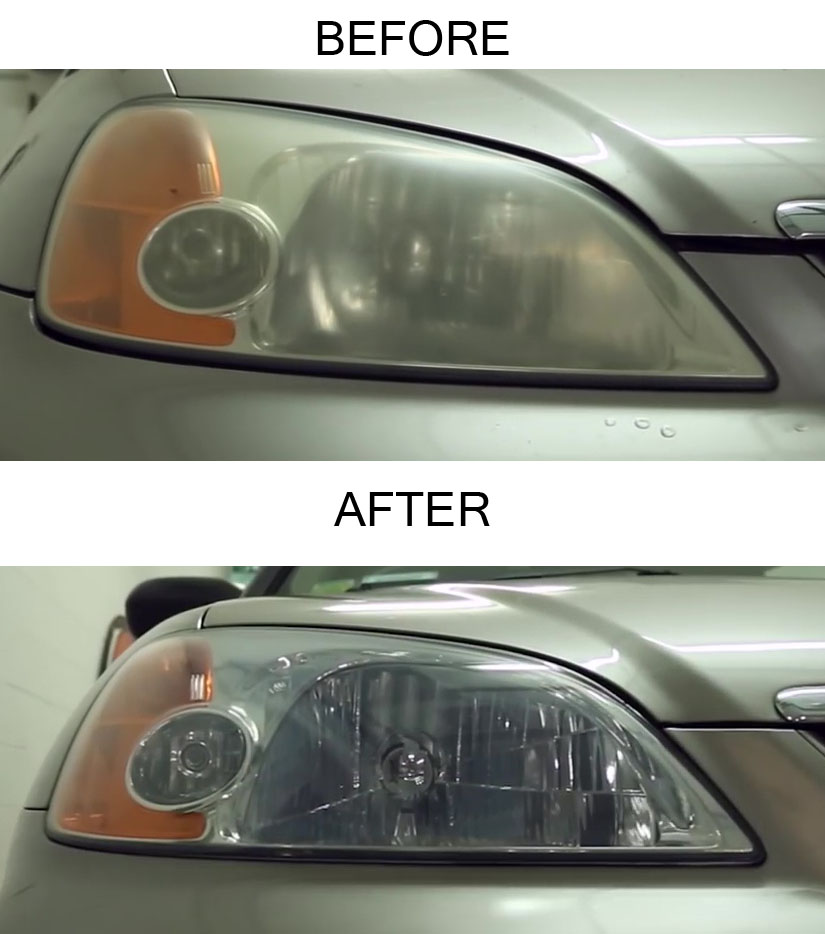
How To Permanently Restore Foggy Headlights
 Love It 5
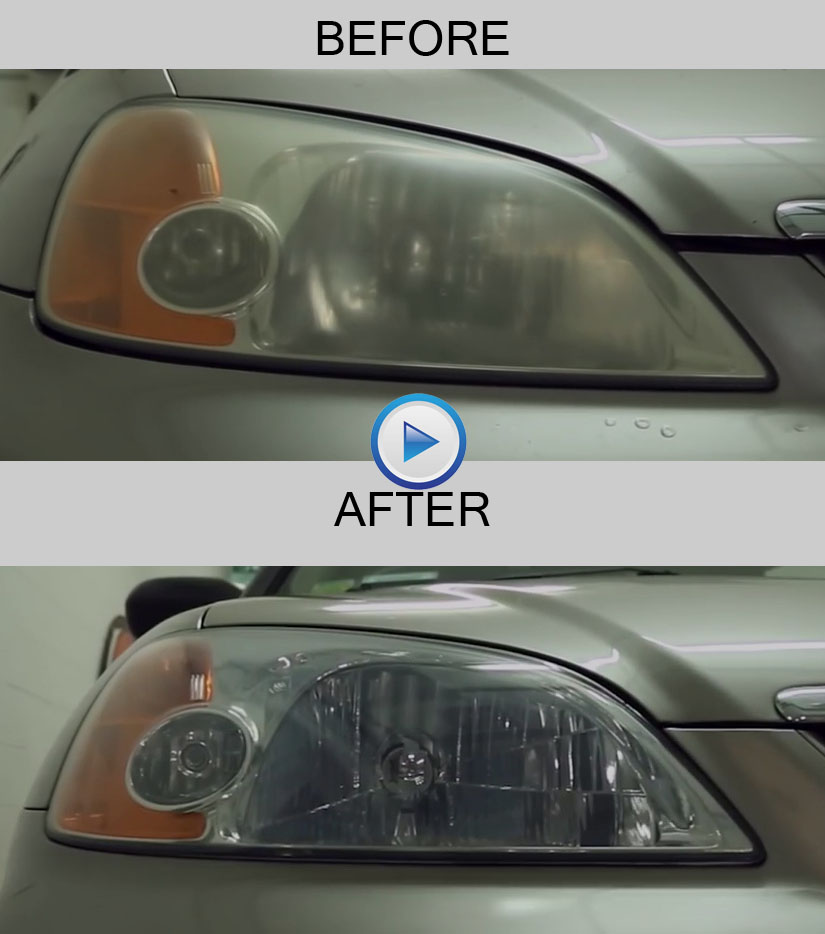
Hope you liked the last tutorial DIY Headlights Restoration With Tooth Paste, as its easy and quick but that can only work in case of little oxidation and moreover that’s not permanent. Today sharing a tutorial by AMMO NYC “How To Permanently Restore Foggy Headlights” and for more detailed demonstration please watch this video:
Or Read This:
First of all I wanna tell you a little bit about why headlights get foggy of fade away. There was a time when headlights are made of glass but those days are long gone. As plastics and technology advanced, material known as polycarbonate plastic was used as a replacement of glass because its lighter, cheaper to manufacture, and more resistant to breaking but off-course there’s a catch, polycarbonate is a porous material and when a bulb shines from inside and UV rays shine from outside, plastic get beating from both sides and its understandable that manufacturer’s UV coating deteriorates quickly and plastic get oxidized and due to oxidation it get yellow and foggy.
Before starting, you must know that this technique is for professionals and serious DIY’ers who willing to spend few extra minutes using sand paper prior to any compounds or polishes. At this point many people will leave, but I assure you that it can be easily fixed with a little bit of patience.
Requirements:
Tape
Sand papers (500 Grit, 1000 Grit, 3000 Grit )
Leveling compound
Electric Drill
Microfiber Cutting Pad
Wax Polish
Foam Finishing Pad
Isopropyl alcohol
Clear Gloss (Non yellowing and UV resistant)
Preparation:
If possible detach the headlights but as its not easy for everyone so you can use tape around the whole edge of headlight, as this will give a nice barrier so that paint don’t get scratched.
Instructions for cleaning:
1 – This process is to remove the burnt up UV coating and in this you can use sand paper between 300 grit to 800 grit (More the Grit value, finer the sand paper). In case of heavy oxidation or damage take 300 grit sand paper but for normal use Sand paper of 800 Grit and start sanding in horizontal direction. This heavy cut process is done dry or without any supplement or wetting agent. One done clean it water and cloth and make sure there are there are no large contaminants that just cut off.
2 – In this you can use sand paper between 1000 grit to 1500 grit and be done with a supplement like water. Spray some water on headlight and sand paper and start sanding in vertical direction. It is the most important step because it will dictate the level of clarity with your final product. Your goal here is to remove the scratches and haze you installed in step 1. Once you are satisfied that 800 grit (step 1) peaks are leveled by 1000 grit sanding, clean you headlights again for step 3.
3 – In this you can use sand paper between 2500 grit to 3000 grit and must be done with a supplement like water. Spray some water on headlight and sand paper and start sanding in horizontal direction. In same way like step 2, 3000 grit sanding will remove peaks made by 1000 or 1500 grit sanding. Once you are done clean the headlight with water and cloth.
4 – This step is known as compounding and to do this apply some leveling compound on microfiber cutting pad attached to electric power drill. Switch on the electric drill and rub microfiber cutting pad on headlight gently. Once you are done clean the headlight with water and cloth.
5 – Next step is polishing and you can done it by applying some wax polish on foam finishing pad attached to electric power drill. Same like compounding switch on the electric drill and rub foam finishing pad on headlight gently. Once you are done again clean it, but this time with to make sure there’s no left over compound or polish.
Your cleaning is done and headlight looks spectacular but it will not last as you have removed the UV coating that originally came with them. The very last step is to protect the newly uncoated and unpolished polycarbonate plastic, otherwise the lens will begin to fade in a month or in weeks. for this you can use a strong cement or headlight specific coating Spray or clear gloss but the key is they all must have non yellowing and UV protection built into the formula for them to be effective. Whichever one you choose be sure that you must read the directions to use and clean lens with rubbing alcohol for best results.
Instructions for Protection:
1) Cover the front of car except headlights with the tape and news paper so that gloss didn’t get sprayed on other parts.
2) Spray clear gloss evenly on headlights don’t make thick coats. Once done wait for 10 minutes, again spray second coat and if necessary do the third coat after another 10 minutes.
Now your headlights are cleaned and protected. Enjoy!